 |
 |
Plug-ins |
The Plug-ins are all kinds of extra features you can add to your site.
 |
Some of the Plug-ins come already installed for you, like the Business Directory, Coupons and Classifieds. Others we leave uninstalled, as these are optional and you may not wish to manage them (things like the Calendar, Jobs Directory, Photo Polls), installing them will be your responsibility.
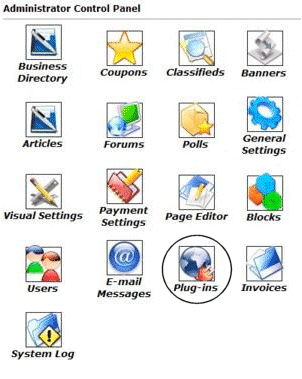
To access the Plug-ins, you will need to login to your Control Panel using your administration username and password. Click on the icon that is circled in this image (Plug-ins).
Once you have clicked the icon, you will see a menu similar to the one below...
|
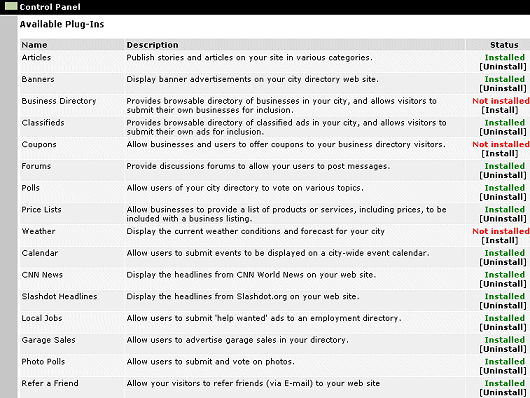 |
To install a plug-in choose [Install]
(Not installed listed above this option)
To uninstall a plug-in choose [Uninstall]
(Installed listed above this option)
Each plug-in is explained in their own chapter's of this Training Guide.
Look them over before installing a new plug-in. However, they are easily removed.
Note: If you have previously installed a plug-in, and then removed it, you can still install it again. Upon the second installation, you may get a warning message exclaiming that the 'table' for this particular plug-in already exists. This is ok. Your plug-in will still have be installed successfully.
|
Furthermore, it is important to know that just installing a plug-in does not make it accessible to your website's visitors. Once it has been installed, you will need to go to the Page Editor and 'set it up'. You will need to make it 'active', tell it where you wish the navigation link to display, and assign it the proper 'plug-in'. How to do this is explained below:
Setting Up Your Plug-in
|
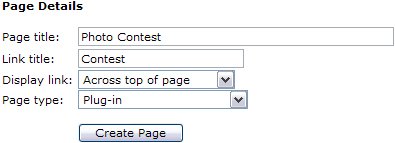 |
| After clicking your Page Editor icon in your Admin Control Panel, you will need to click the text link for a New Page. In this example, we are going to set up the Photo Poll plug-in. In the Page title we have inserted the page name. This title is also what will be displayed in your navigation menus. In the Link title we have entered Contest. Remember, this is the name file that will be created and must be one word. Next decide where you wish the link to display. And finally, since this is a Plug-in, change the Page type from HTML, to Plug-in. Click the Create Page button to continue.
Please do NOT use any HTML in this area! |
|
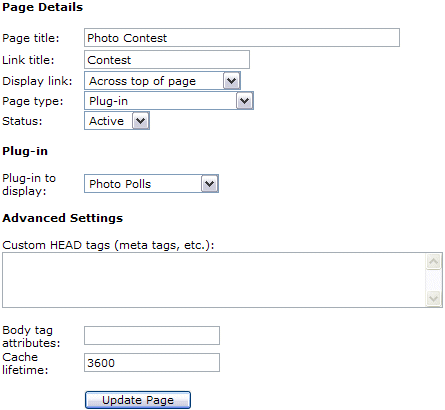 |
To complete the activation of your new Plug-in, you will need to change the Status from Hidden to Active. Next you will need to change the Plug-in to display from the default 'Business Directory' to the 'Photo Polls', or whichever Plug-in you are actually installing.
See left example of changes.
Finally select Update Page. |
|
|