 |
 FAQs Plugin FAQs Plugin
Installing This Plugin and Adding it to a New Page
|
You will first need to Install the Plug-in, if you have not already done so.
Next, it is important to know that just installing a plug-in does not make it accessible to your website's visitors. Once it has been installed, you will need to go to the Page Editor and 'set it up'. You will need to make it 'active', tell it where you wish the navigation link to display, and assign it the proper 'plug-in'. How to do this is explained below:
Setting Up Your Plug-in
 |
|
|
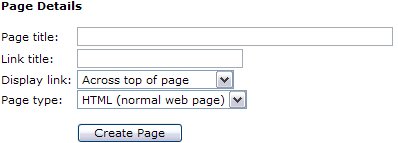
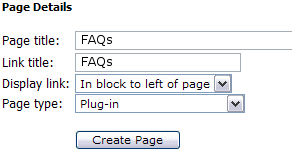
After clicking your Page Editor icon in your Admin Control Panel, you will need to click the text link for a New Page. In this example, we are going to set up the FAQ plug-in. In the Page title we have inserted the page name. This title is also what will be displayed in your navigation menus. In the Link title we have entered FAQs. Remember, this is the name file that will be created and must be one word. Next decide where you wish the link to display. And finally, since this is a Plug-in, change the Page type from HTML, to Plug-in. Click the Create Page button to continue.
Please do NOT use any HTML in this area!
|
|
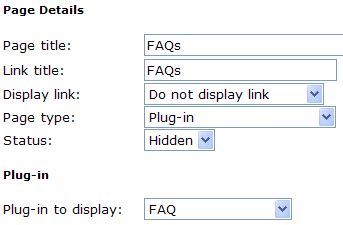 |
To complete the activation of your new Plug-in, you will need to change the Status from Hidden to Active. Next you will need to change the Plug-in to display from the default ' Business Directory' to the ' FAQ', or whichever Plug-in you are actually installing.
See left example of changes.
Finally select Update Page.
|
|
Accessing the FAQs Managment Area in Your Control Panel
|
After you have completed these steps, you can return to the Control Panel. You will now be able to see and select the FAQ icon in your Administrators menu to set up your categories, questions and answers. The installer does not do this for you.

Once you have clicked the FAQs icon from your Control Panel, you will see a menu similar to the one below.

|
Managing Your General Settings
|
 Settings Settings
This is where you can add text to be displayed either above or below the FAQ list..
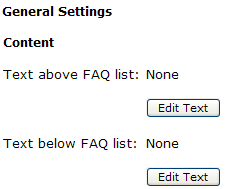 |
Clicking the Edit Text button will bring you to a WYSIWYG supported editor that operates just like your Page and Blocks editor. Please see those respective chapters of the Training Guide for further details on using this editor.
NOTE: Outside Java applets and codes placed in this are are not supported by our staff. This is a simple text editor, and may not be able to properly save other programming language codes. Please use care.
|
By placing 'code' from other sources in the editor may cause the following: Improper displaying of content when viewed in the browser, locking the Update Button after saving so no further changes can be made, distorting the page and payout of the page the content was added to, causing blocks to display in 'wrong' areas, causing blocks not to display at all. All of these effects are caused by the code entered into the editor, not of any fault with our software. If this issue occurs, the content will be deleted by our staff.
|
Setting Up The Categories, Questions and Answers
|
 FAQs Categories and Questions FAQs Categories and Questions
This area is where you will configure the Categories for your questions, the questions and the answers.
|
To begin, simply click the ' Add new category' link.
Then type in a name for a category of questions (such as: Classifieds, Calendar, Registering). When you are finished, click the ' Submit' button.
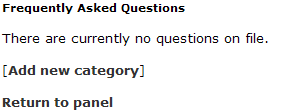
Continue adding categories as you need them following the same process. When you are finished and are ready to create your questions and answers for these categories, click the link shown here:

|

|
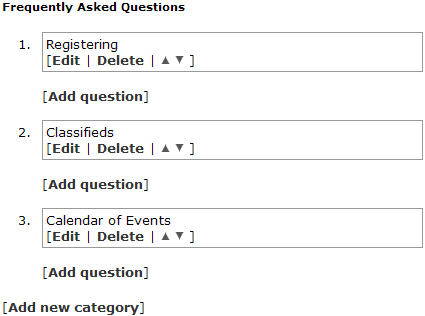 |
After adding your categories, you will see them in a numbered list. You now have the ability to edit or delete a category here, as well as move it position higher or lower in the list by clicking the appropriate up and down arrows.
To add a question and answer, click the ' Add question' link. This will bring to you a simple form where you can type in the question and the answer and select a category in which you wish it to display. All questions will be sorted in alphabetical order.
|
|
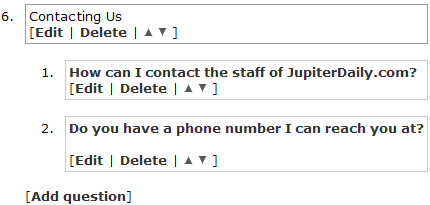
Once questions and answers have been configured, you can see that they are also numbered and have the same editing ability as the categories. |
|
|
|
|
 |