 |
 Webring Webring
Your website can be the host of a local website ring. Local website owners are able to join the webring and then be given a code to paste into their own sites. Admin can configure the name of the webring and is able to upload a small image to be displayed within the webring code on all sites linking to it.
You will first need to Install the Plug-in, if you have not already done so.
Next, it is important to know that just installing a plug-in does not make it accessible to your website visitors. Once it has been installed, you will need to go to the Page Editor and 'set it up'. You will need to make it 'active', tell it where you wish the navigation link to display, and assign the proper 'plug-in'. How to do this is explained below:
Setting Up Your Plugin
 |
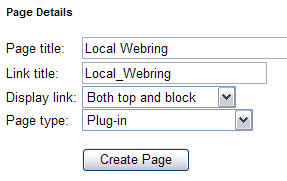 |
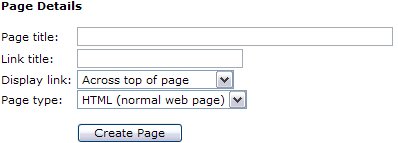
| After clicking your Page Editor icon in your Admin Control Panel, you will need to click the text link for a New Page. In this example, we are going to set up the Webring plug-in. In the Page title we have inserted the page name. This title is also what will be displayed in your navigation menus. In the Link title we have entered Local_Webring. Remember, this is the name file that will be created and must be one word or words connected by an underscore (ex: Real_Estate). Next decide where you wish the link to display. And finally, since this is a Plug-in, change the Page type from HTML, to Plug-in. Click the Create Page button to continue. |
|
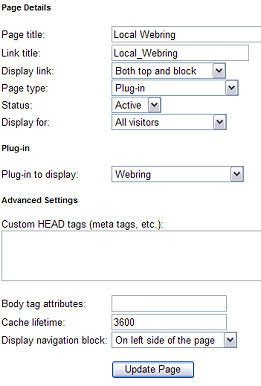 |
To complete the activation of your new Plug-in, you will need to change the Status from Hidden to Active. Next you will need to change the Plug-in to display from the default 'Business Directory' to the 'Webring', or whichever Plug-in you are actually installing.
See left example of changes.
Finally select Update Page. Your page is now complete and ready to begin collecting signups from your users who wish to add their website to your Webring!
After you have completed these steps, you can return to the Control Panel. You will now be able to see and select the Webring icon in your Administrators menu!
|
|
Once you have clicked the Webring icon, you will see a layout similar to the one below.
Please note: When your plugin is first installed, there will be no websites awaiting approval. We have inserted sample websites for demonstration purposes only.
|

This is where you could first see any websites that wish to join your webring. If you have your settings set to hold all websites for approval, these websites will be listed here. If you have your settings set to automatically approve websites that wish to join, no websites will be listed here. You would then click the Subscribers icon to view all sites currently active in your webring.
Below we cover the different Administration Areas available for your webring plugin.
 Settings Settings
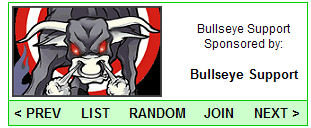
This is the area where you Name your Webring plugin, the Url of your website that is sponsoring the plugin, whether or not you wish to approve new websites and upload a logo image to be displayed within your Webring code on sites that join.
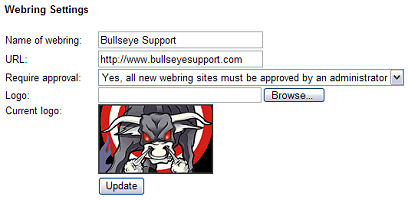 |
It is suggested that in the Url field you place the Url of the page in which you applied your webring plugin. If you prefer, you can simply use your homepage Url.
Logo image will display actual size of image uploaded. It is strongly recommended you keep this image no larger than 200 x 200 pixels.
|
 Prices Prices
This is where you will decide whether to offer your webring membership for free or for a price. The price package only supports one price for a lifetime membership. It is not able to be broken down to memberships by month, quarters or annual membership at this time.
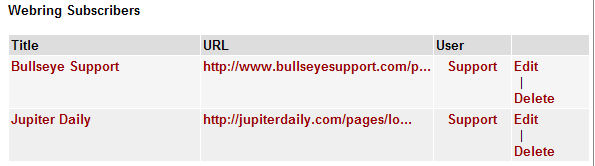
 Subscribers Subscribers
This is the area in which all current webring subscribers are listed once they have been approved.
How do users add their websites to your Webring? Please visit the next section of this chapter to see how a user will subscribe.
Webring
Upon logging in to your website, a user can click on the Webring icon in their User Control Panel. Next they will click the 'Click here to join the webring' text link.
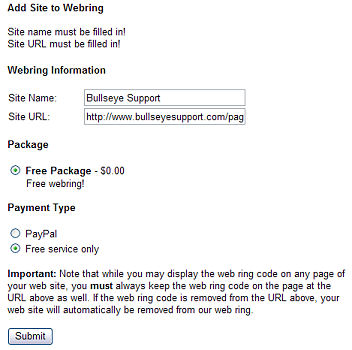 |
Here they will add the name of their own site they wish to add to the Webring and the Url to the page within the site in which they will be adding your webring code.
If there is a charge for the webring, they will select the package type they wish to purchase as well as the Payment Processor they will be using to submit their payment. The options available will depend upon the options configured in your Administrators Control Panel --> Payment Settings.
After clicking 'Submit' they will review their invoice and submit any payment if one is due.
If the option is checked for websites to be held for approval, their website must be approved before gaining access to the script to place within their own websites.
If the website has been approved either automatically, or by the reviewing process of an administrator, they can continue to the next step. |
| Important: Note that while the User may display the webring code on any page of within their web site, they must always keep the webring code on the page at the URL above as well. If the webring code is removed from the URL specified above, their web site will automatically be removed from the web ring. |
 Getting the Script Getting the Script
Users can return to the Webring icon within their User Control Panel to get the necessary script to place within their own website. After their site has been approved, they will be able to click the 'Get Script' text link next to he URL of the page that will be added to the code.

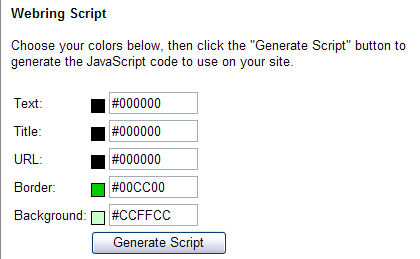
This will bring them to a page where they can somewhat control the way the script will look within their own website to better help it conform to their current color schemes.
| They can use the color picker to choose pallet colors, or enter any hex number of their choosing within the fields provided to create the color combination they prefer.
Clicking the 'Generate Script' button will offer them a preview of the script as well as provide the proper code for them to copy and paste within their own site.
 |
 |
The Webring runs a nightly maintenance script that will check each subscribers web pages to ensure the webring code is still properly inserted. If it detects that a site is "cheating", it'll mark the site as "disabled" in the database and will automatically E-mail the User to let them know to apply the code or their site will remain disabled from the Webring.
No intervention is required by the admin -- as soon as the user puts the webring code back on his site, the system will automatically detect this during the next maintenance run within 24 hours and re-activate their site in the webring.
|
|