The Blog plugin allows your users (visitors) to read posts that have been published to by yourself. You can set up blogging categories and even allow visitors to comment on your blog posts, if you wish.
Suggestions for improvements to this plugin can be made here:
Next, it is important to know that just installing a plug-in does not make it accessible to your website's visitors. Once it has been installed, you will need to go to the Page Editor and 'set it up'. You will need to make it 'active', tell it where you wish the navigation link to display, and assign it the proper 'plug-in'. How to do this is explained in the Install the Plug-in chapter of the guide.
Accessing Your Blog Plugin
The next step will be to login to your Control Panel (this is the same Url as the User Login link on your homepage) using your administration username and password.
You will want to click on the icon that is circled in this image (Blog) in order to create, view and manage your blog posts and comments.
Upon clicking the Blog icon, you will see a menu like the following:
Home
Settings
Posts
Approvals
Categories
Below we have explained the purpose of each section.
Managing Your Blog General Settings
Settings
This is where you will set up your blog options.
General Settings
Allow comments:
Hold comments for approval:
Show category list:
As you can see from the options above and their drop down bars, you have the ability to set whether or not visitors to your site can submit comments of their own. If you choose to allow them this option, you will also need to decide whether or not you wish for them to be held for your approval, or to publish them immediately for other visitors to read.
The 'Show category list' option allows you to decide whether the category block should appear on the right hand side of your blog page or if you wish to not have it display.
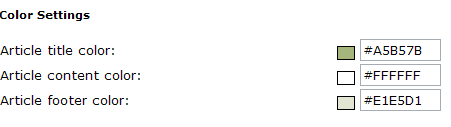
Blog Color Settings
This section will allow you some control over how the blog page layout would display. Click on a color block to change its color or enter a hex value into the field to the right of the color blocks.
Once you have finished changing your preferences in the Settings, click the button to continue.
This section will allow you the ability to place content using the editor above and/or directly below the categories table on the Blog page. This is optional, if you need additional space to provide instructions, or an announcement.
Clicking the 'Edit Text' button will allow you access to the editor where you can customize the content to be displayed in these areas. Please see the Page Editor Chapter for further details on using this editor.
For a complete list of the WYSIWYG Icons and what they do,
please click here.
Here you can read and review already created blog posts.Your can enable or disable posts individually. You can also make any changes to existing blogs or delete them.
Edits a blog (or to enable/disable). Deletes a blog.
Clicking the Edit icon will allow you to edit any aspect of the blog post, including the Status, Title and the Topic Category. Click the 'Update Post' button upon completion of any changes.
Submitting a Blog Post
To submit a blog post, simply click the Blog icon in the Administrator Control Panel section. Then click the Posts icon from the Blog Menus. Next click the 'New Blog Post' text link. Only an Admin can create new blog posts.
Complete the short form offered and click the 'Submit Post' button to complete your submission.
The blog post should contain both 'Summary text' and 'Extended text' or your blog will not post correctly. Images and Podcast audio files are optional.
Approving Blog Post Comments
Approvals
You need only worry about this section if you have decided to hold user comments for review and approval before they are posted.
This is where you would come to review any pending comments made to any blogs. You need only decide whether to Approve or Delete the comment by clicking the appropriate text link located directly below the comment as seen in this image.
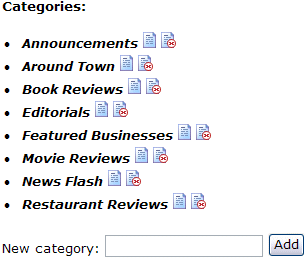
Managing Blog Categories
Categories
Adding categories and subcategories to your Blog plugin is a snap! Or should we say 'a click'?
To the left, you can see a sample list of categories and your option associated with them.
Edits a category (changes it's name). Deletes a category.
And to create a new category, simply type in the name of the new category into the field below the existing categories and click the Add button.
Note: You can create as many categories as you wish. The Blog section does not offer subcategories, however.


 For a complete list of the WYSIWYG Icons and what they do,