|
 Classifieds Classifieds
Accessing Your Classifieds Plugin Management Section
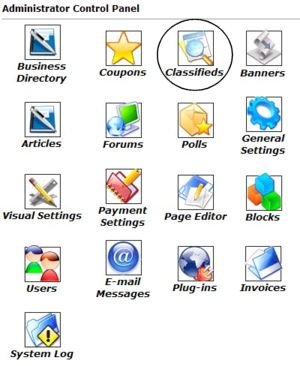 |
In order to access and edit your Classifieds module, you will want to login to your Control Panel using your administration username and password. Click on the icon that is circled in this image (Classifieds). This includes setting pricing, approving or denying ads, editing current ads, and creating new ad categories.
Once you have clicked the icon circled, you will see a menu similar to the one below...
|
Classifieds Menu

|
How To Edit Your General Settings
|
 Settings Settings
This is where you will set up your classifieds options, prices and add any custom text either above of below the categories listing.
General Settings
As you can see from the options above, and their drop down bars, you have the ability to set whether or not ads will be automatically added to your classifieds section, or if you want to review and approve each ad first.
Note: If you prefer to screen all classified listings for appropriateness prior to activation, you should set 'Action for pre-paid listings' to 'Hold for administrator approval'. Also note that if you enable the 'Allow users to edit listings' feature, your users will be able to completely change the classified details after you approve it. This may defeat the purpose of holding the classified for approval. But will save you the headache of updating an ad each time they notice a typo or need a small adjustment.
 Click the Update Settings button after setting preferences. Click the Update Settings button after setting preferences.
Setting your Prices for Ads
Prices (per week)
|
:: Basic classified ad: |
This sets your price for a basic ad without any of the additional options below. If you wish it to be Free to list a basic ad, keep this number set to 0.00. |
|
:: Bold upgrade: |
This will allow the Classified Ad to be Bold in the classifieds listings to help this ad stand out from among his fellow advertisers. |
|
:: Highlight upgrade included: |
This will allow the Classified Ad title to be a color the Advertiser selects upon registering to help his ad stand out from among his fellow advertisers. |
|
:: Attention Grabber upgrade included: |
This will allow advertisers to choose an image  from a small library of images offered to be displayed with his classified ad to help his ad stand out from among his fellow advertisers. from a small library of images offered to be displayed with his classified ad to help his ad stand out from among his fellow advertisers. |
Our classifieds section only supports classified ad payments in a weekly form. No other payment options are supported. If you wish to ad others, it is up to you do. We do not provide help for this.
|
How to Edit The Content Areas Above and Below the Classisifed Categeories
|
This section will allow you, the admin, the ability to place a small amount of text either above or below the categories table on the Classifieds page. This is an option if you need additional space to provide instructions, or an announcement.
Clicking the Edit Text button for text above or below the categories you will see the following:
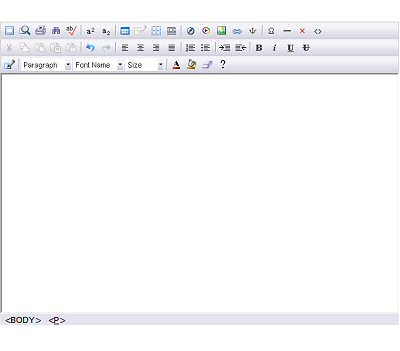
This is what your editor looks like. You can highlight and delete the current text displaying there by clicking and holding down your right mouse button and dragging it over the words Add your content here. And then clicking the Backspace button on your keyboard. Now you are ready to create your own text!
Please see the Page Editor Chapter for further details on using this editor.
 For a complete list of the WYSIWYG Icons and what they do, For a complete list of the WYSIWYG Icons and what they do,
please click here.
|
Manging Existing Classified Ads and Approving New Ones
|
 Ads Ads
Here you can edit any information pertaining to a current classified listed in your classified section, or enable / disable a ad awaiting your review. After selecting the above Ads icon, you will see a list of all classifieds currently listed or awaiting approval. You can view the Ad title, the classified description, the expiration date (this is the date that the classified will be deleted from your site, their current status (Awaiting Approval, Enabled, or Disabled), and finally you are given the ability to Edit or Delete  the classified. the classified.
Clicking the Edit  link allows you to access the Ad Details section to edit any current information, or enable / disable the ad. At the bottom of the Ad Details is a button to Update your changes. link allows you to access the Ad Details section to edit any current information, or enable / disable the ad. At the bottom of the Ad Details is a button to Update your changes.
Clicking the Delete link will delete the ad from your site (this cannot be undone).
|
How To Manage the Classifieds Categories
|
 Categories Categories
Adding categories and subcategories to your classifieds section is a snap! Or should we say 'click'?
 |
To the left, you can see a sample list of categories and your option associated with them.
Edits a category (changes it's name).
Deletes a category.
And to create a new category, simply type in the name of the new category into the field below the existing categories and click the Add button.
|
To create a subcategory for any category, click the Category Name you wish to add to, not the Edit icon.
Clicking Return to Top will return you to the main categories list.
Note: You can create as many categories as you wish. Each category can have as many subcategories as you wish. And each subcategory can have as many sub-subcategories as you wish, and so on. You get the idea? |
How to Place a Classified Ad
 Classifieds Classifieds |
 |
In order to add or edit a classified, you will want to login to your account. Click on the icon that is circled in this image (Classifieds). If you are logged in as Admin, this will be the icon in the TOP section of the Control Panel.
Once you have clicked the icon, you will see a menu similar to the one below...
|
Current Classified Ads
You currently have no classified ads in the directory.
Create a new classified ad | Return to panel |
|
If you do not have a classifieds listed in the directory, you will need to choose the Create a new classified ad. You will need to fill out the form as explained below... |
Classified Ad Details:
This section contains basic information such as name address and a description. You must enter a contact person. There is also a section for a website URL if the business has one, if it does make sure to include the www. If you do not have a website simply leave it blank.
Categorization:
This will be where the ad will display.
Logo:
If you would like a logo image (or picture of the item for sale) to be listed with in your ad you can upload it here. Click on Browse to find the image on your computer.
Duration:
Select how long to you want the ad to be displayed.
Additional Options:
This is any extra items you may want to add to your listing to increase its visibility. Some options may cost extra.
Payment Options:
Choose how you would like to pay for the classified ad. Your listing will not be visible until payment has been received.
Once finished simply click on the Submit Ad button at the bottom of the page.
Your classified ad may be held for review and if payment is owed, it will not be published until payment is received. You can view the status of all your ads by returning to the Classifieds Management area in the User Control Panel.
If your ad has not been yet approved, it's status will be displayed as Awaiting Approval. Once approved it's status will display as Active. You should also receive an email upon classified approval.
|
Invoice Description:
This page is an itemized list of each option you choose and the cost for each along with the total due. If you chose to mail in the payment, you will find the mailing address on this page as well, if mail-in payments are accepted. Please make sure to include your name, username, and classified ad title. When you are finished click on Return to take you back to your User Control Panel.
|
 Sample Sample
Below is an example of how the classified will display in your directory:
This image is a bit blurred due to the shrinking of this image for faster loading.
|
|
|